


iFunia Media Player User Guide


iFunia Media Player is a totally free video/audio player, which supports playing almost all the populoar streaming media files, including 4K, 5K and 8K HD files. In addition, it is a light-weight media converter, which supports converting to a vairiety of video/audio formats. In this guide, we will introduce all the features of iFunia Media Player to help you to get started.
Download & Install
For Mac Version
1. You can download the installation package of iFunia Media Player from the below link.
 Free Download macOS 10.15 or later
2. Install iFunia Media Player for Mac with the downloaded package.
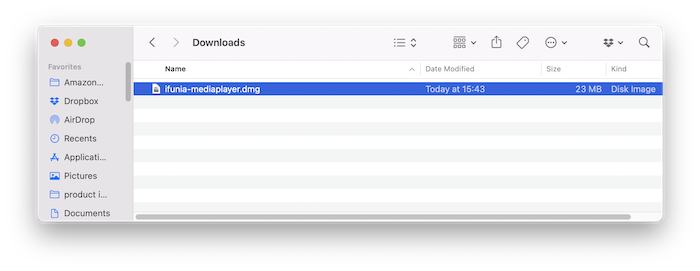
Double-click the .dmg file.
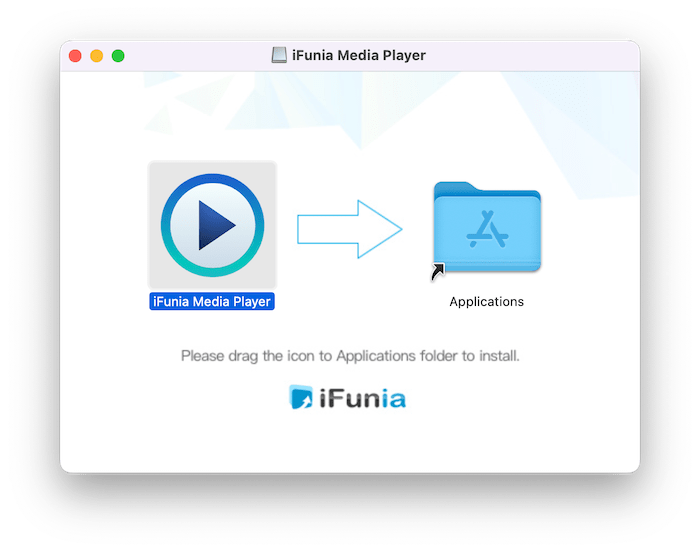
Drag the iFunia Media Player icon to Applications folder.
For Windows Version
1. You can download the installation package of iFunia Media Player for Windows from the below link.

2. Install iFunia Media Player with the downloaded package.
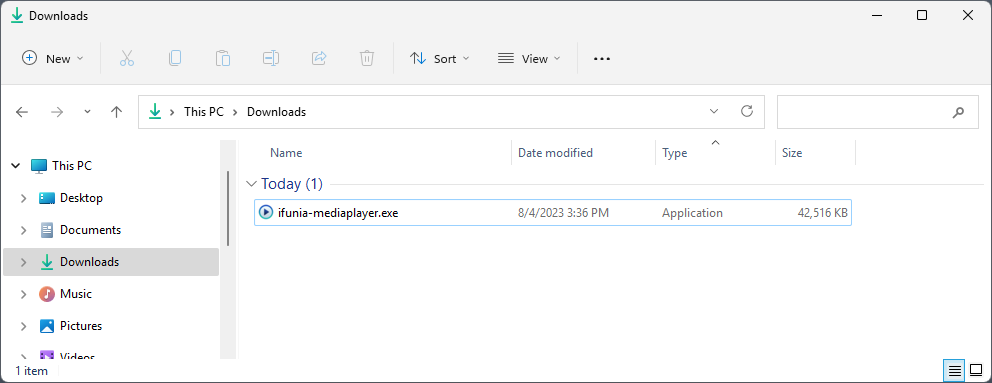
Double-click the .exe file to run it.
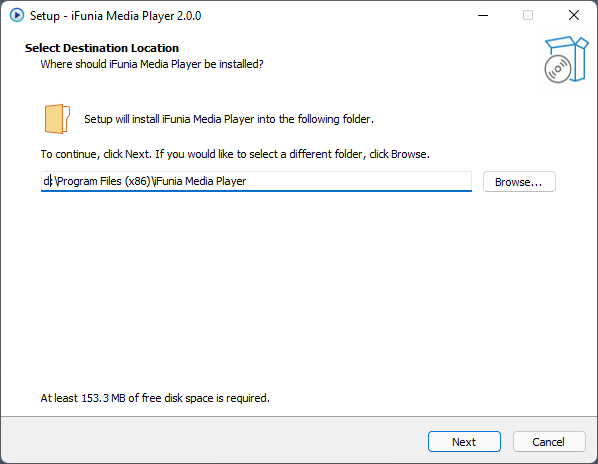
Select a folder to install the program (It is recommended to save it under D: drive instead of C: Drive)
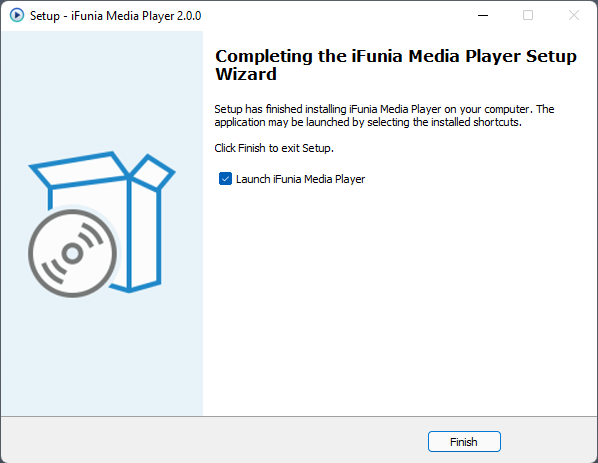
Click Next > Next > Install to continue the installation process, when the below window appears, it means that the program has been installed successfully.
Activation
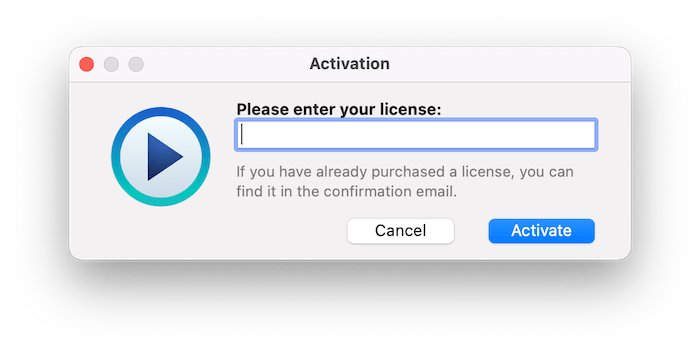
For Mac Version
After installing the program, you need to activate the program if you want to use the full version features.
1. Go to Lauchpad or Applications folder, double click iFunia Media Player to run the program, and then click the key icon in the top right corner.
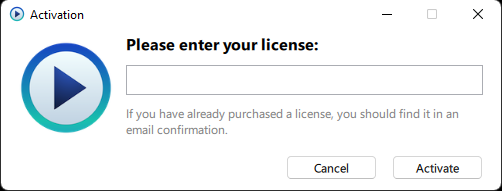
2. Copy-n-paste the license code into the popped-up window, click Activate.
For Windows Version
After installing the program, you need to activate the program if you want to use the full version features.
1. Find iFunia Media Player on the desktop or in the folder where you installed it, double click to run it, and then click the Help > Activate iFunia Media Player
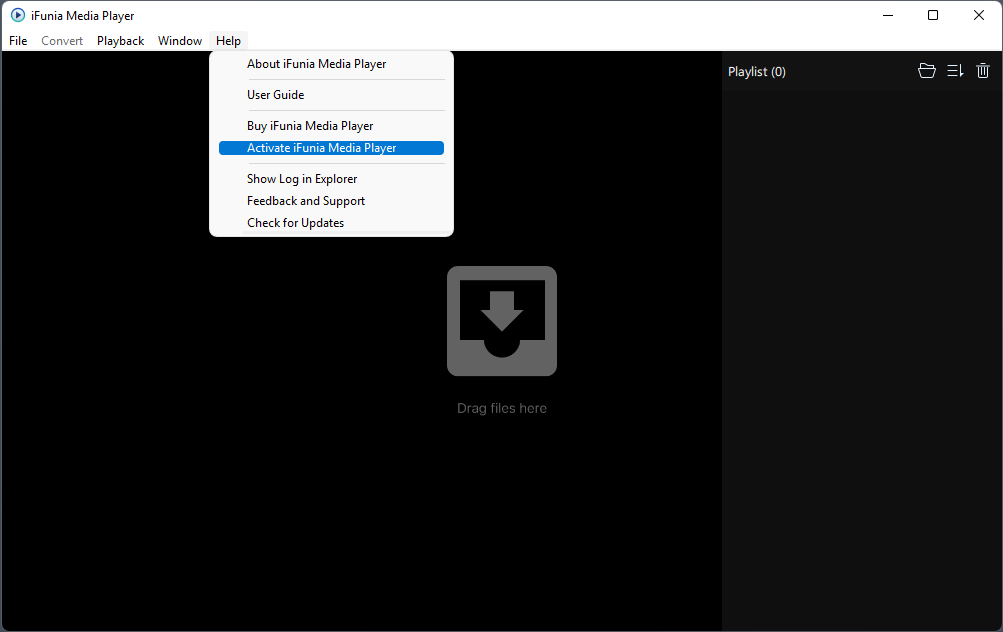
2. Copy-n-paste the license code into the popped-up window, click Activate.
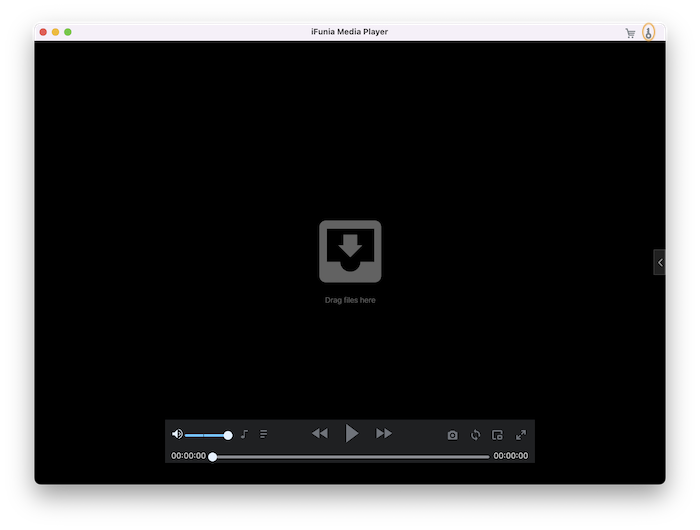
Play Video and Music
Import Video and Audio Files
iFunia Media Player supports importing both video files or the folders include video files, and there are 4 ways to import them:
1. Drag-n-drop the target videos/folders on the main interface directly.
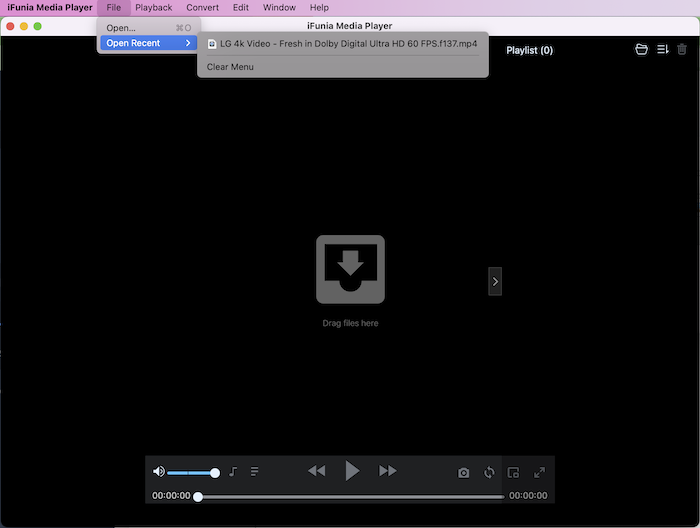
2. Click File > Open File on the menu bar, select the videos/folders you want to play.
3. Click  on the playlist, select the videos/folders you'd like to play.
4. If you want to fast locate the previous videos you played before, you can directly find them through File > Open Recent on the menu bar.
Control Video Playback
You can control video's playback on the below control bar.
Play/Pause: To play/pause the video, you can click  or
or  on the playing interface, or directly press "Space" on your keyboard.
Stop: To stop the video, you can directly press "Option+S" on your keyboard.
Step Forward: To step forward the video, you can click  on the playing interface, or directly press "Right" on your keyboard's direction keys.
Step Backward: To step backward the video, you can click  on the playing interface, or directly press "Left" on your keyboard's direction keys.
Volumn+: To increase the video's voice, you can slide 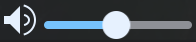 right on the playing interface, or directly press "Up" on your keyboard's direction keys.
Volumn-: To decrease the video's voice, you can slide left on the playing interface, or directly press "Down" on your keyboard's direction keys.
Mute: To mute the video's voice, you can click  on the playing interface.
Rotate: You are allowed to rotate the played video to different degrees by clicking Playback > Rotate on the menu bar, and then select a proper degree on the drop down box.
Adjust audio tracks and subtitles
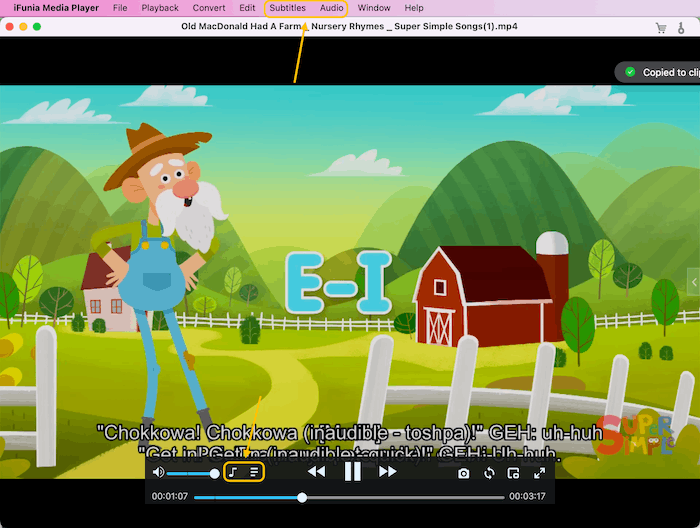
Click  on the playing interface or Audio on the top menu bar, you can change audio tracks.
Click  on the playing interface or Subtitle on the top menu bar, you can choose "No subttiles" or "Choose Subtitles" to upload the subtitle files (.srt and .ass supported) .
Take Screenshots
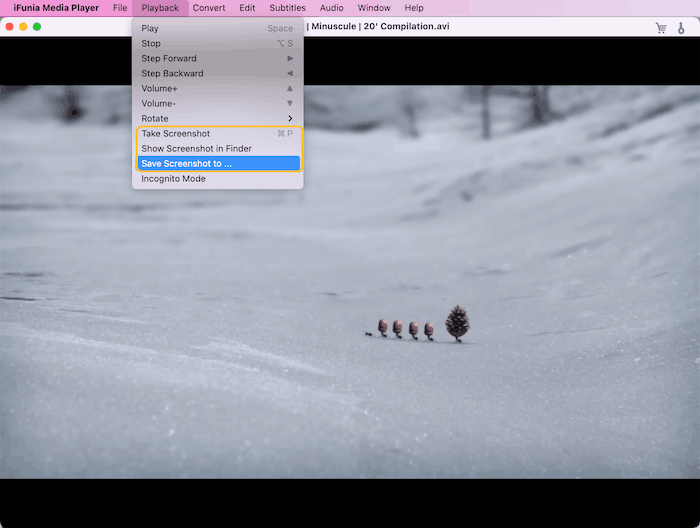
To take a screenshot of the video, you can click  on the playing interface, or directly press "Command+P" on your keyboard. The screenshots will be saved to /Users/Pictures/iFunia Media Player automatically. You can also click Playback > Save Screenshots to ... to change the save path.
Use Full Screen and Mini Screen Mode
Mini Screen: To play the video in a mini screen, you can click  on the playing interface.
Full Screen: To play the video in full screen, you can click  in the playing interface, or directly press "Ctrl+Command+F" on your keyboard.
Tips: Instead of playing in full screen, and you want to zoom to maximum window, you can directly double click the title bar, the play window will auto resize to the maximum.
Manage Playlists
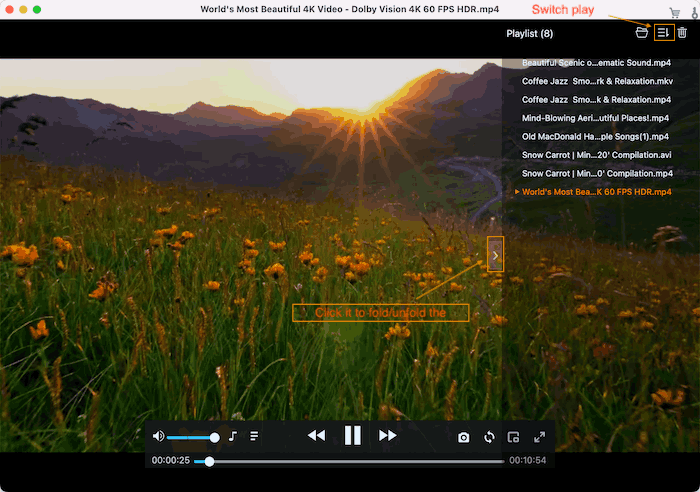
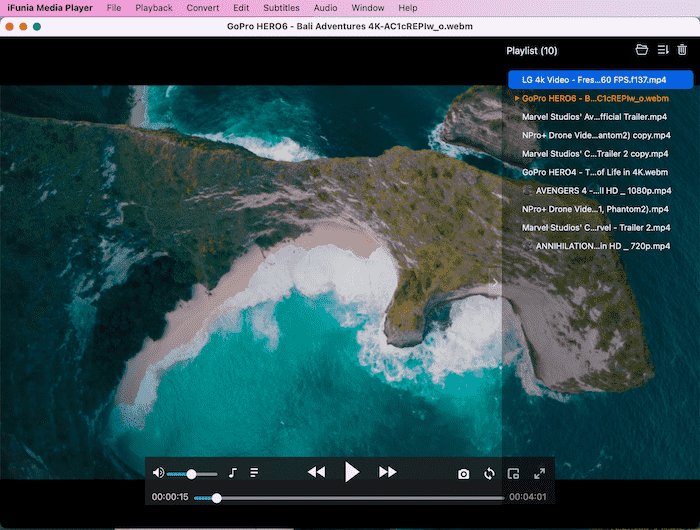
Click  , you can switch to the Playlist mode, all the uploaded videos will be displaying on the Playlist, and you can manage all the videos there.
Switch video: Just double click the video you want to switch to on the playlist.
Remove video: You can directly click the "X" after the video's name, and the video will be removed from the playlist.
Play Mode: There are 4 modes Play in Order  , Play in Loop
  , Play Single in Loop
  , and Play in Random
  , you can directly click the mode button to change the play mode.
Clear Playlist: To remove all the videos on the playlist at a time, you can directly click ![]()
Incognito Mode
iFunia Media Player will auto remember the playlist and the playback position you previously imported, but if you do not want to remember them, you can click to activate Incognito Mode, and then your operations on the program will not be remembered any longer.
Play Video with Separate Mode? (For Mac only)
Sometimes you may need to separate the video playback window, playlist and control bar into different monitors, so that you can control the playback of videos and playlist without affecting other people's viewing of the video. In this case, you can turn on the Separate Mode by following the steps below:
Step 1 Click Window > Separate Mode to turn on Separate Mode
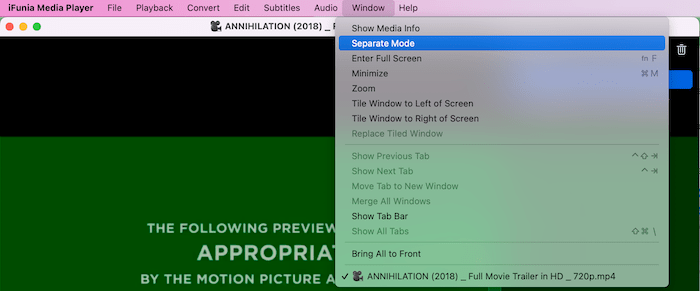
Step 2 Drag the video playback window, playlist or control bar to any monitor you like
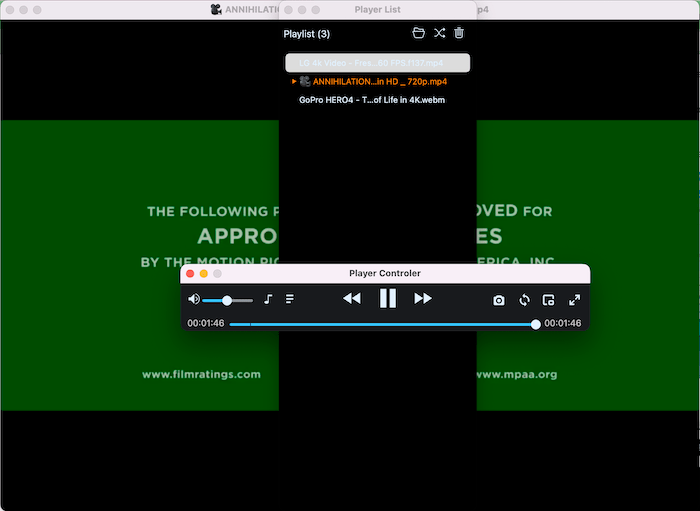
Tips: If you want to quit the Separate Mode, just close the window of Playlist and Player Controler.
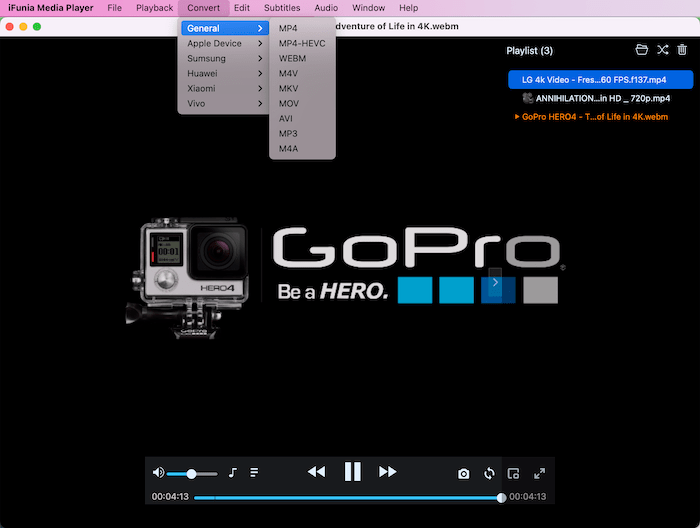
Convert Video and Audio Files
Click ![]() on the playing interface, or click Convert on the menu bar, select a proper format you need to convert to.
on the playing interface, or click Convert on the menu bar, select a proper format you need to convert to.
You can edit the video name, choose another save location or change the resolution rate on the following window, and then click  when everything is done.
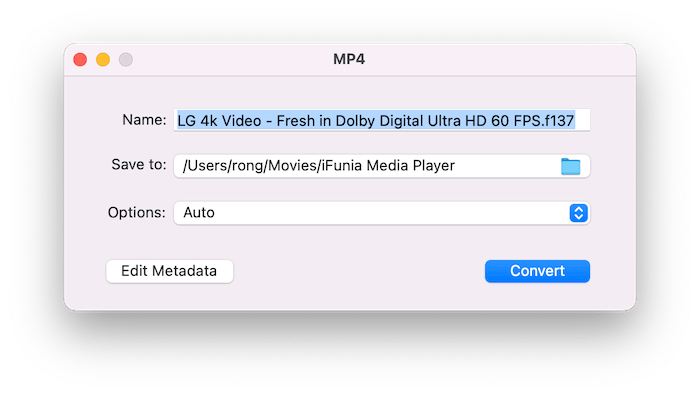
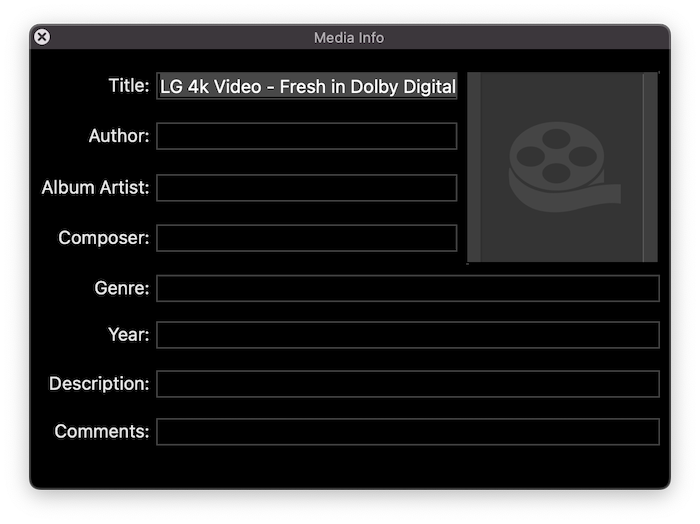
Tips: You can click  to edit the media data of the converted video.
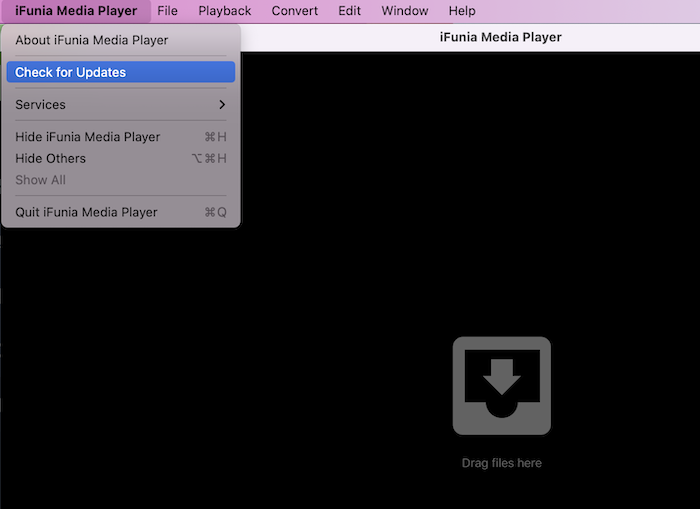
Update iFunia Media Player
We always suggest users to use the latest version of the program.
When you launch iFunia Media Player, iFunia will auto check for updates.
Also, you can click iFunia Media Player > Check for Updates… on the left top menu bar to manually update it.

Jessica Nielsen has worked in iFunia for 8 years, she is very familiar and professional with video parameters and iFunia’s programs, and can provide accurate and useful suggestions to iFunia users.
Comments (0)
Leave a Reply