


This user guide explains how to use iFunia Video Converter step by step, including how to convert videos, convert audio files, compress videos, edit videos, play media files, and update the application.
iFunia Video Converter for Mac User Guide
Get Started
Download & Install
1. You can download the installation package of iFunia Video Converter from here.
 Free Download macOS 10.15 or later
2. Install iFunia Video Converter with the downloaded package.
Double-click the dmg file.
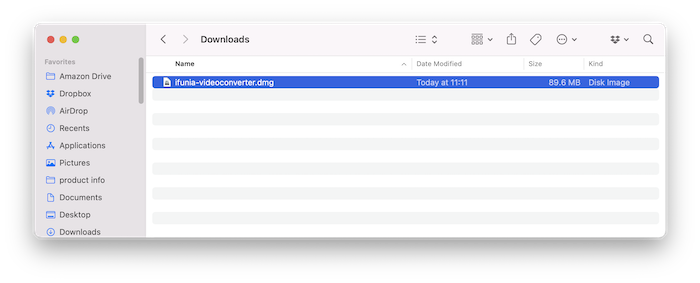
Drag the iFunia Video Converter icon to Applications folder.

Activation
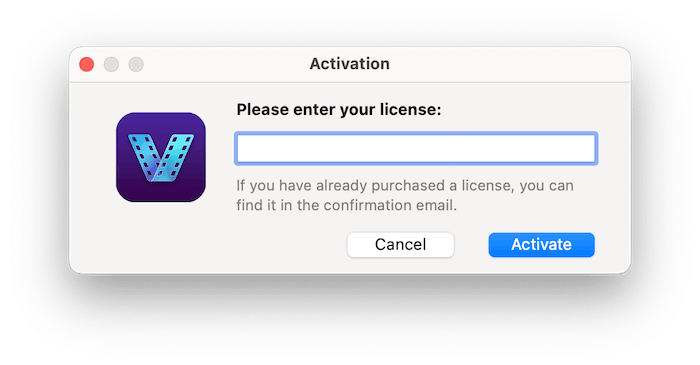
After installing the program, you need to activate the program if you want to use the full version features.
1. Go to Lauchpad or Applications folder, double click iFunia Video Converter to run the program, and then click the key icon in the top right corner.
2. Copy-n-paste the license code into the popped-up window, click "Activate".
Convert Any Video Format on Mac
If you are a Mac user, you will find that there are many videos that can be played on a Mac but not on a PC and vice versa. In such a case, iFunia Video Converter will come in handy to help you convert videos to any format you like in the following simple steps.
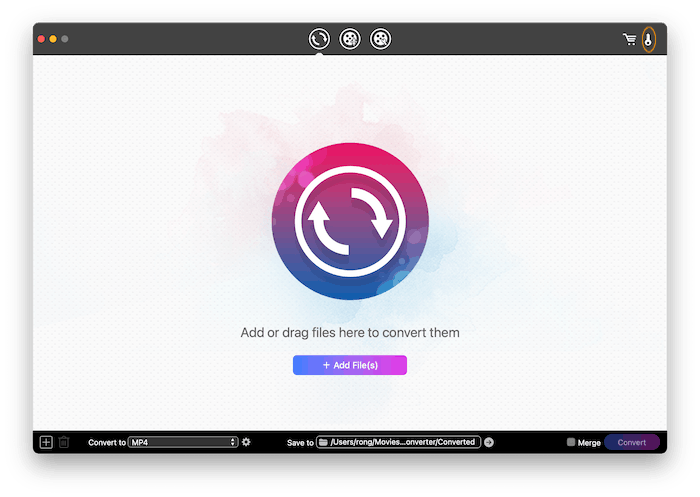
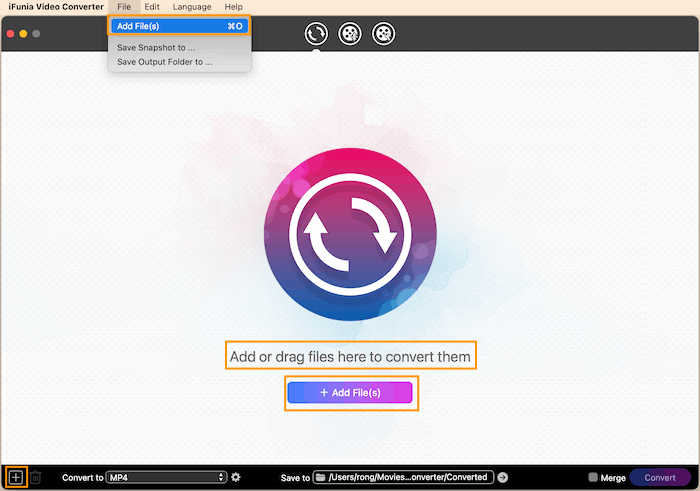
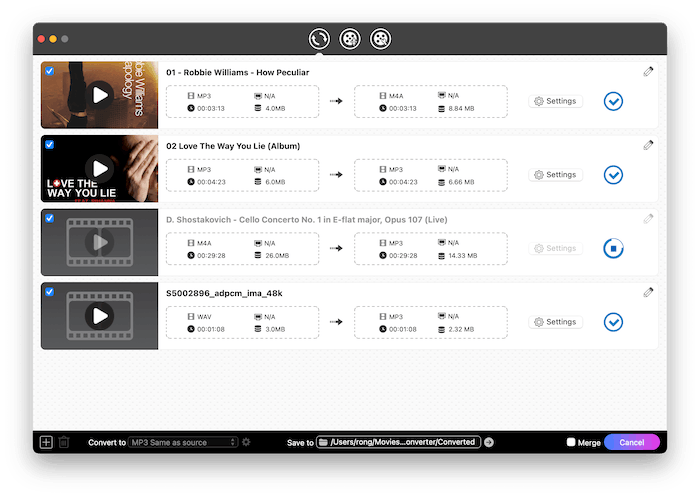
Step 1 Select the Convet tab, and then you can import videos by dragging or dropping the target videos into the blank area of the main interface, clicking  /
/ or tapping File > Add Files... on the top menu.
Tips:
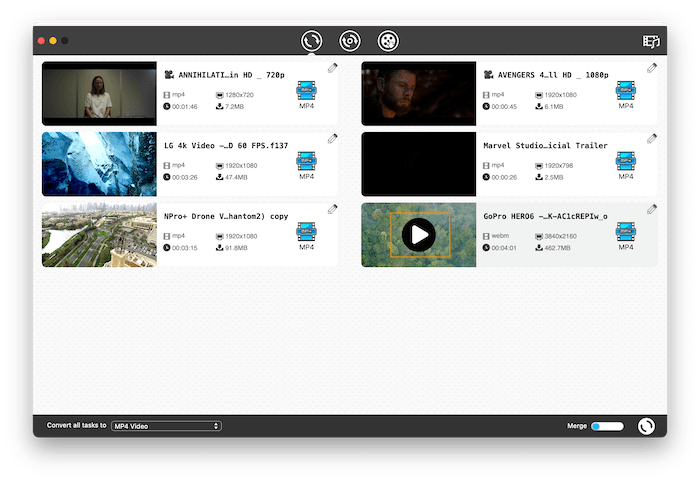
1. To remove the added video files, you can select the target videos, press the "Delete" key on your keyboard or click  on the left lower corner of the interface.
2. You can perform play, edit, do advanced settings and delete on a target video file by right-clicking it.
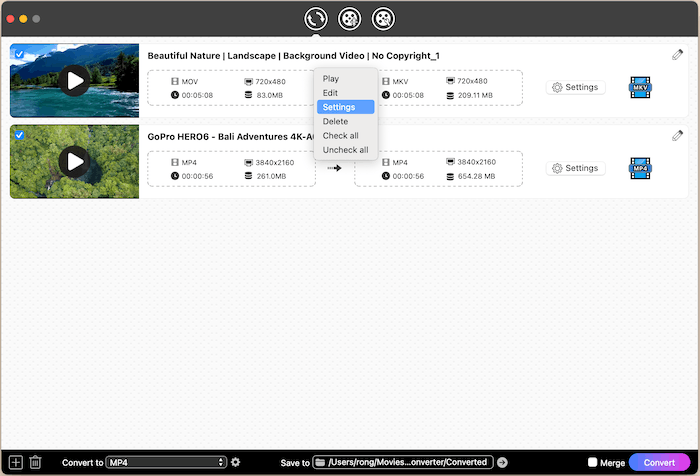
Step 2 Select a target Output format
There are various output video formats supported with iFunia Video Converter, just click the icon  , then you can select the desired format. If you want to convert multiple videos to the same format, you can directly click "Convert all tasks to" to select your desired format.
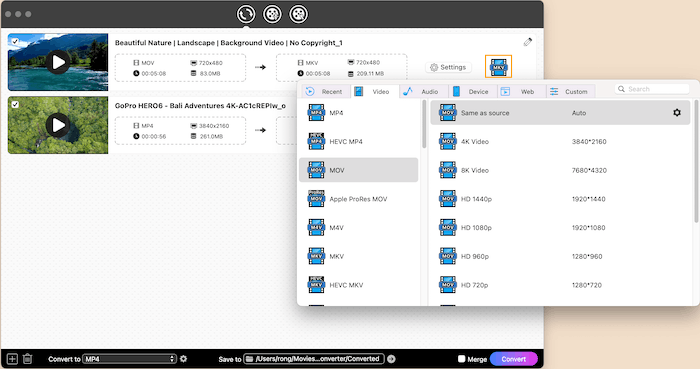
You can also make advanced settings of the output file by clicking  after the output format or click
  after Convert all task to.
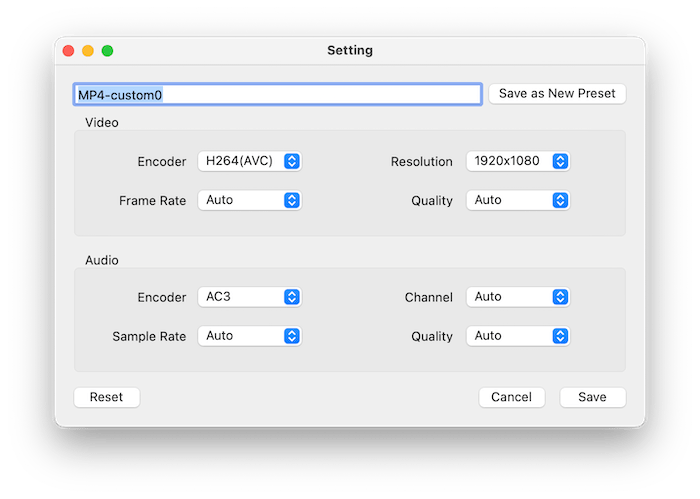
If you use this setttings usually, you can click  to save your custom settings for your further use.
Step 3 Edit the video(Optional)
If you want to trim, crop or perform other edit tools on your video file, you can click ![]() to get into the Edit window. You can get more details from Video Editor.
to get into the Edit window. You can get more details from Video Editor.
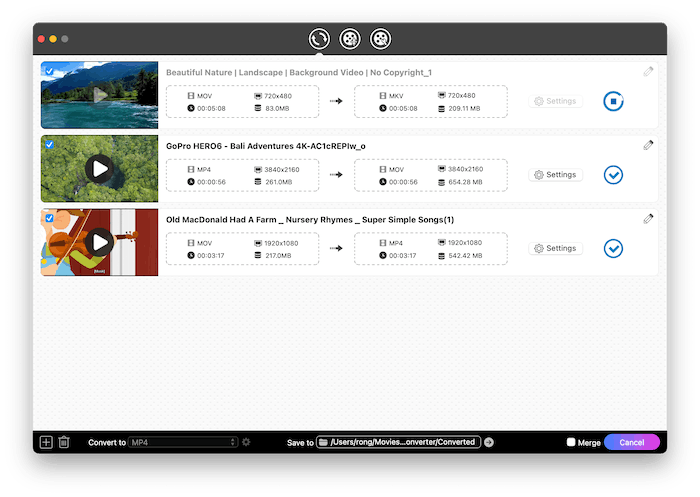
Step 4 Select a location through "Save to" to save the converted file, and then click  to start the conversion.
Tips:
1. You can directly click  to fast locate the converted video files.
2. If you want to generate one video to combine all the videos in, just check  before clicking the Convert button.
Please note that when you slide on the Merge button, please click "Convert to" to choose or change the output format.
Extract Audio from Video on Mac
Besides video files, iFunia Video Converter also supports converting music files, so if you don't have a music player that can support all the audio formats, own iFunia Video Converter will help you to convert audio files to any format.
Step 1 Select the Convet tab, and then you can import videos by dragging or dropping the target videos into the blank area of the main interface, clicking / or tapping File > Add Files... on the top menu.
Step 2 Choose an Audio Format
There are various output audio formats supported by iFunia Video Converter, just click the format icon after the audio, in the drop-down window, click Audio tab, select you preferred format from the list. If you want to convert all the audios to the same format, you can directly click "Convert all tasks to" to select your desired format.

Step 3 Select a location through "Save to" to save the converted file, and then click to start the conversion.
Compress Videos on Mac
The video compressor feature allows you to reduce the size of video files so they are suitable for emailing or uploading. You can just select a percentage or file size that you need, Cisdem will automatically compress your video files with suitable parameters. You can also choose to manually choose the parameters as you like.
Step 1 Add files
Navigate to the Compress tab, click / or File > Add Files... to upload videos, you can also simply drag and drop videos into the program's interface.
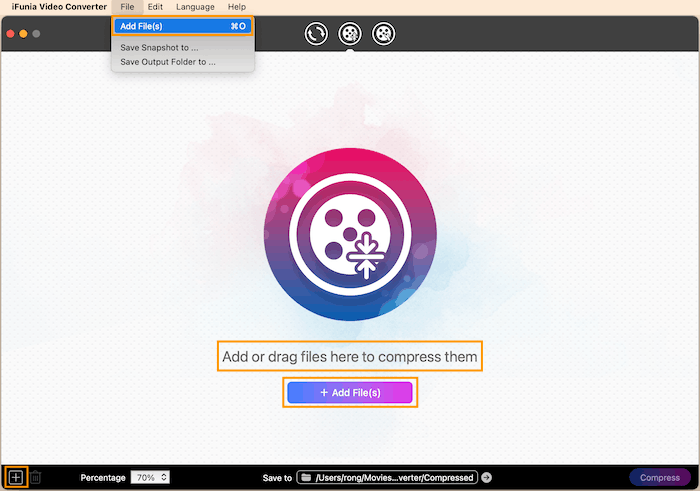
After adding the video files, you can click the Play icon on the thumbnail or right click the video to play the video file. Also you can click or right click the video to delete the wrongly added video.
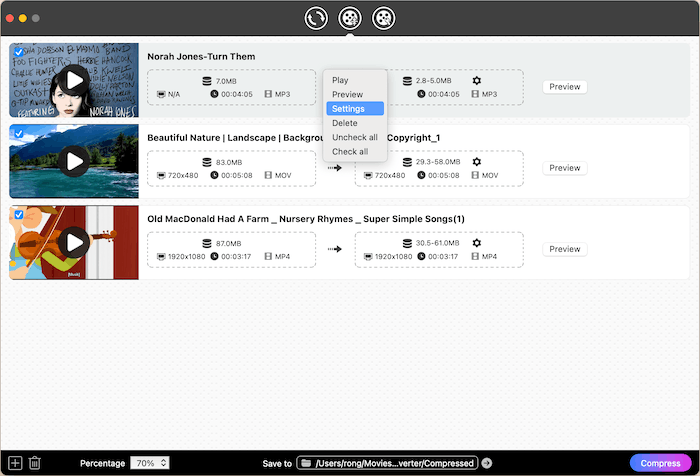
Step 2 Select a file size
1. Quick Compress: You can directly click  to select a proper percentage you want to compress for all the imported video files.

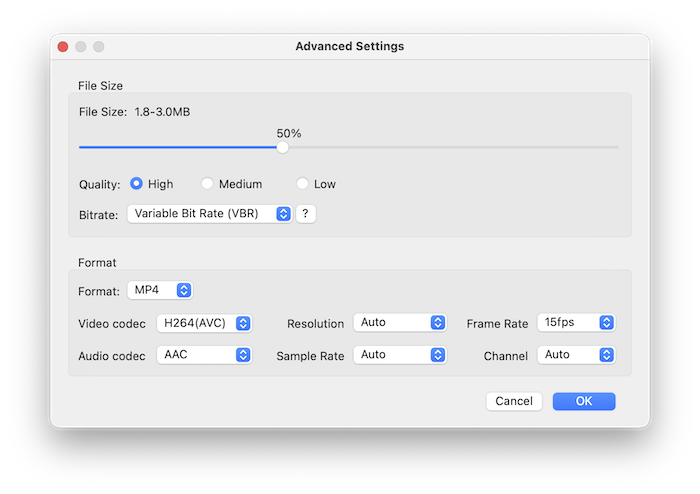
2. Advanced Compress: You can click  to get into the advanced setting window to select a file size and parameter for each video file.
3. Preview compressed video: After selecting the file size, you can click  to check the compressed video.
Step 3 Select a save location and start compressing.
Select a proper location through the "Save to" option, click  to start compressing all the video files.
Edit Videos on Mac
Besides converting videos, with iFunia Video Converter, you can also edit the videos when you need. You can directly navigate to the Edit tab and add the video files into the program or under the Convert/Rip tab, click ![]() at the right upper corner of the imported video to get into the Edit window. You can trim, crop, effects, rotate, watermark, subtitle, chapter and volume on the video, below is a introduction to all the editor tools.
at the right upper corner of the imported video to get into the Edit window. You can trim, crop, effects, rotate, watermark, subtitle, chapter and volume on the video, below is a introduction to all the editor tools.
a. How to Trim a Video
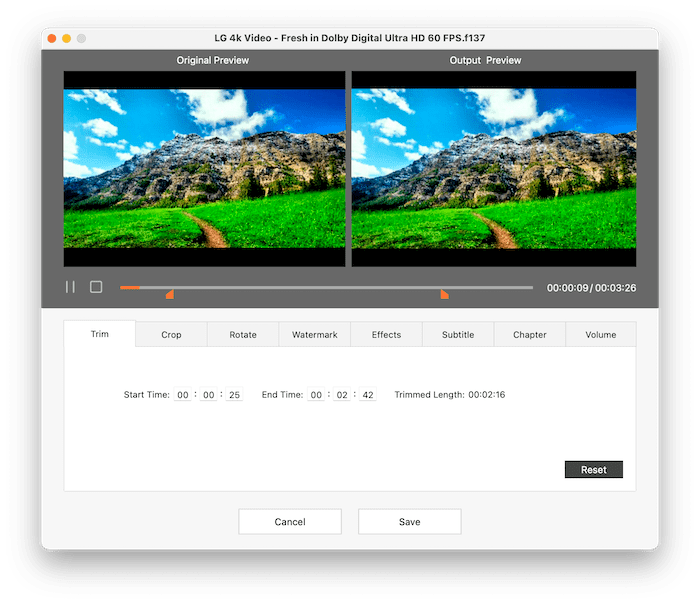
1. You can click  to play the selected file. Move
  and
and  of the playback progress bar to choose a specific part of the video.
2. You can also manually enter the Start Time and End Time to confirm the clip to be trimmed.
Note: If the time you enter is unreasonable, like the End Time is greater than the video duration or the End Time is less than the Start Time, the time will be reset automatically.
3. To reset the start and end time back to the original, just click 
b. How to Crop a Video
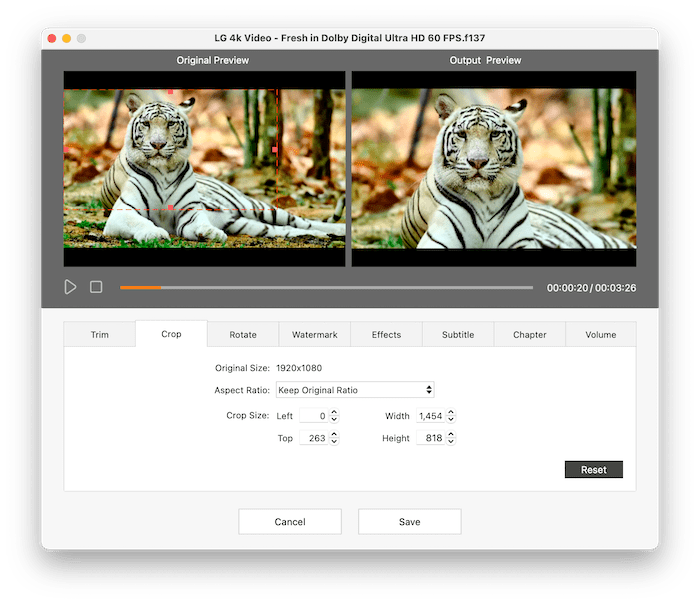
1. Navigate to Crop tab, you can manually adjust the cropping area by dragging the central and surrounding handles.
2. You can also adjust the size and position of cropping area by changing the figures in those four boxes.
3. You can select an output aspect ratio for cropping with four options: Keep Original Ratio, 16:9, 4:3 and Any.
4. To reset the video back to the original, just click
c. How to Rotate a Video
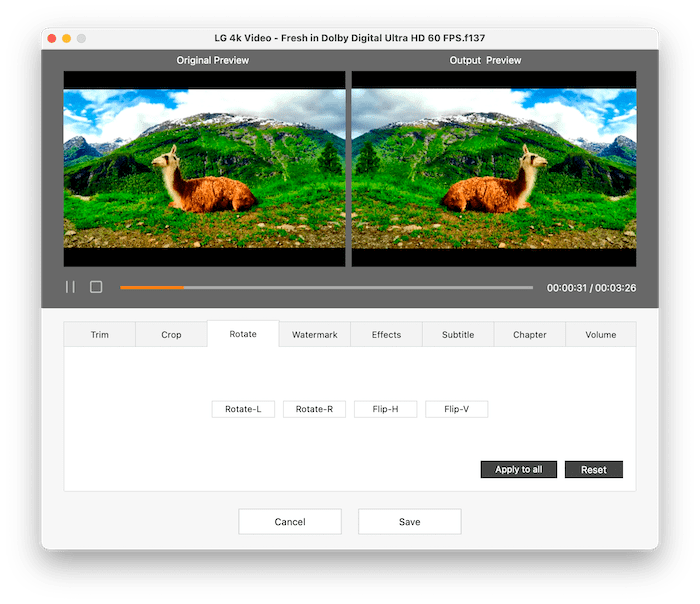
1. Navigate to Rotate tab, each of the four buttons specifically represents one specific way to rotate or flip the video, click the button as your requirement.
2. To reset the video back to the original, just click
3. If you want to rotate all loaded videos as same as this one, you can click 
d. How to Add Video Effects

1. Navigate to Watermark tab, you are allowed to add any text watermark or image watermark to the video.
2. Text watermark: select the "Text type", type the content in the box, pick its font and color by clicking  and
and  , and set its position and degree of transparency.
3. Image watermark: select the "Image type", click to choose the image to be used as a watermark, and set its position and degree of transparency.
4. If you want to use the watermark on all loaded videos, you can click after finishing the watermark.
e. How to Add Watermark to Video
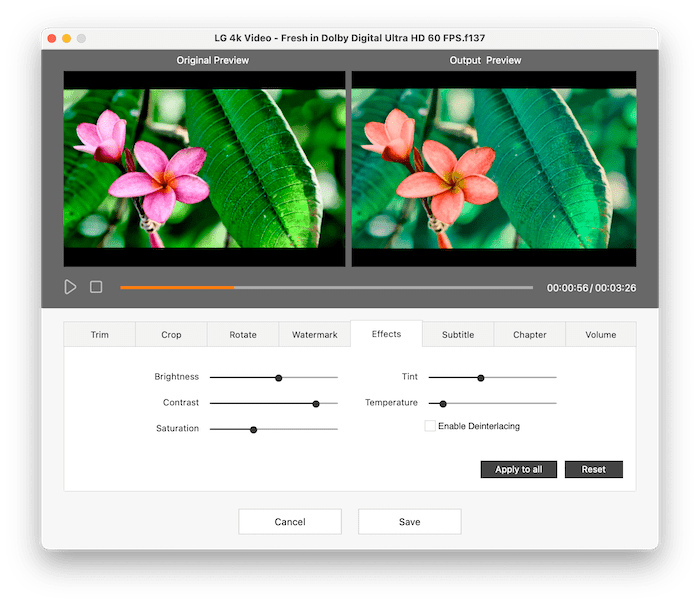
1. Navigate to Effects tab, set the degrees of Brightness, Contrast, Saturation, Tint, Temperature by resetting their respective control sliders.
2. Choose a special effect for the output video from the list in "More Effects" option box.
3. In this section, you also can find the deinterlacement feature, which can turn interlaced videos into a non-interlaced form, enhancing spectators viewing experience rather appreciably. And it is also quite easy to use. Just need to check the box of "Enable Deinterlacing".
4. To cancel all the effects and reset the video back to the original, just click
5. If you want to use the same effects on all loaded videos, you can click after finishing the settings.
f. How to Add Subtitles to Video
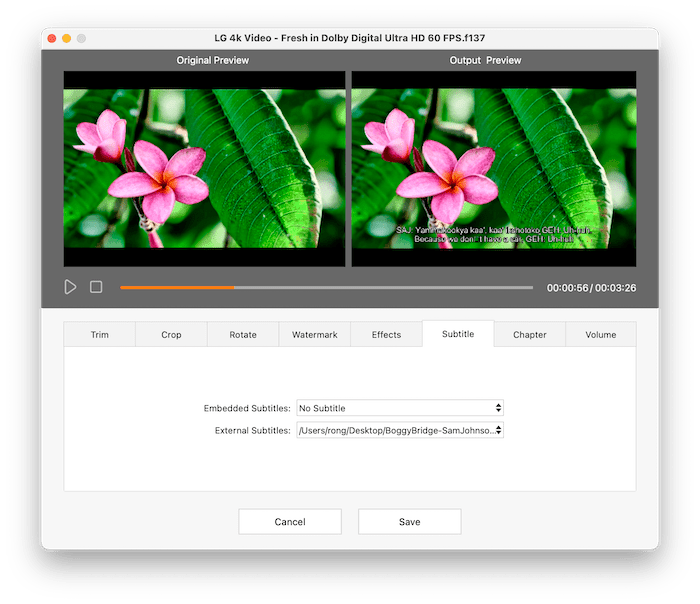
Navigate to Subtitle tab, and then you are able to select embedded subtitles the video includes or import an external subtitle files from your local drive.
Tips: iFunia Video Converter supports .srt, .ass and .ssa subtitle file.
g. How to Load or Add Chapters in Video
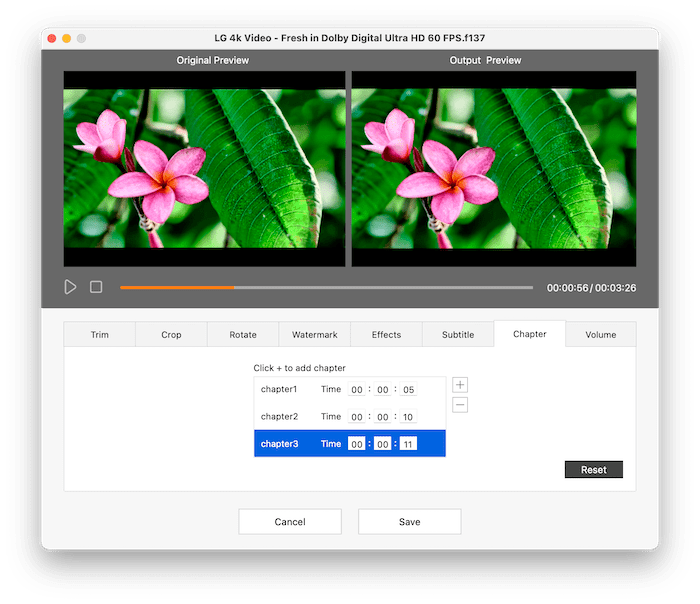
Navigate to Chapter tab, click  , fill in the end time, press "Enter" on your keyboard to confirm your filling, then Chapter 1 has been created. You can also add chapter2 or more chapters in the same manner.
Tips: iFunia Video Converter can not only create chapters, but also recognize the chapters that you created in another video editor program. You will just need to get into the Chapter section, and then iFunia will auto recognize the chapters and display them in the chapter box.
h. How to Adjust Video Volume
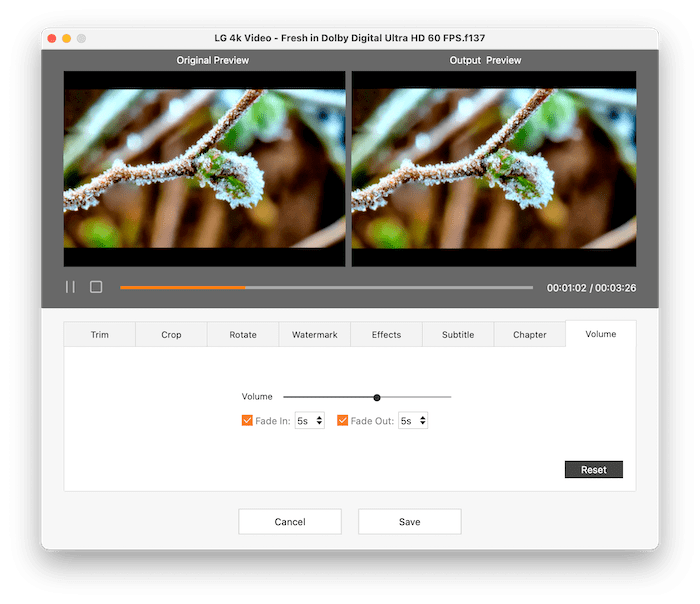
1. In some cases, the voice of the original video is too loud or too low, if you want to adjust it, you can navigate to Volume tab, slide the volume bar as you like.
2. In addition, if you want to add “Fade In” effect at the beginning of the video or add “Fade Out” effect at the end of your video, tick the option “Fade In” or “Fade Out” and then select the duration.
Tips: After saving the editing settings, it will bring you back to the Convert window, you can click the play button on the video's thumbnail to preview the effect of the edited video.
Play Video on Mac
iFunia Video Converter has a built-in video play that allows you to play any format in one place, in the following steps, we will instruduce you how to use it to play any format videos.
Step 1 Import the videos into iFunia Video Converter
Click / or File > Add Files... to upload a video file from our local drive, you can also simply drag and drop the target video into the program's interface.
Step 2 Play the video
Click the play button on the thumbnail of the target video, then it will bring you into a video play window, here you can pause or stop the video, adjust the volume and capture the images by clicking 

Tips: You can click File > Save snapshot to... to change the save location of the screenshots, also you can click File > Show snapshot in Finder to fast locate the screenshots.
If you want to play videos with more personalize settings, you can download and install iFunia Media Player, which is totally free for the playback of videos.
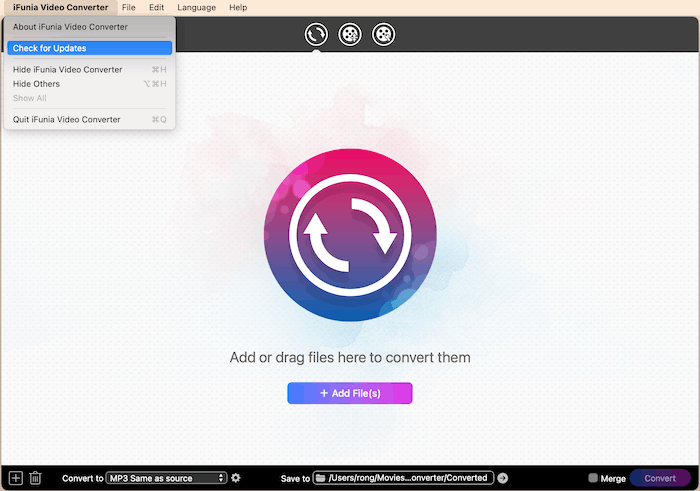
Update iFunia Video Converter
We always suggest users to use the latest version of the program.
When you launch iFunia Video Converter, iFunia will auto check for updates.
Also, you can click iFunia Video Converter > Check for Updates… on the left top menu bar to manually update it.

Jessica Nielsen has worked in iFunia for 8 years, she is very familiar and professional with video parameters and iFunia’s programs, and can provide accurate and useful suggestions to iFunia users.
Comments (0)
Leave a Reply